I’m sure you’ve seen some nice watercolour art prints online or at retail stores. How about making your own from scratch? At the comfort of your home too!
In my case, I did it in my living room. As for the materials, you will need-
-watercolour paper(buy it loose piece or a pad) or a piece from your younger sibling’s drawing block
-watercolour cake or in tube form
-white gouache paint *optional
-assorted brushes
-toothpick or wooden stick
-tissue papers
-chinese ink
-water container
-a placemat or newspaper to protect your working area from stains
**you can get some of these materials from Popular or Art Friend.

I prefer to have torn edges for my paper.

Step 1- Choose a light colour and make your first mark.
Step 2- Wet a small area and drop a colour. Watch it spread.
Step 3- Add another colour while it’s wet. I added orange.

Step 4- Add a puddle of water and add a few drops of yellow and orange.
Step 5- Tilt the paper slightly and observe the paint drips. You may repeat this step on other parts of the paper.

Step 6- Explore markmaking with the brush.
Step 7- Explore more colour mixing. Wet paint on wet paper.
Step 8- To remove excess paint or water- dap tissue paper over it.
Step 9- While paint is still wet, try using Chinese ink and add on.

Detailing part is always fun and you can do as much as you want.
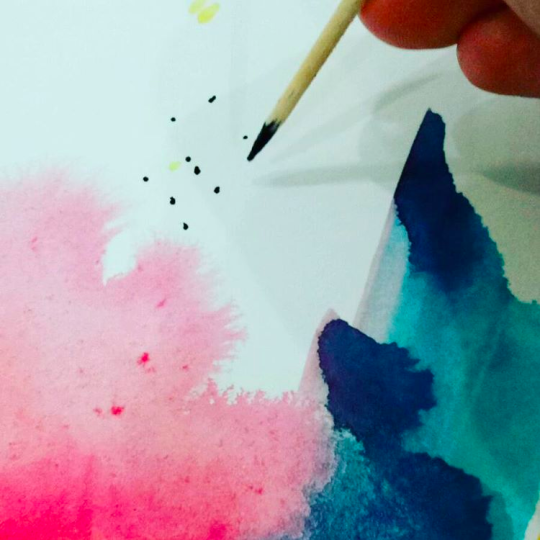
Step 10- Use toothpick or wooden stick and dip it in Chinese ink and create patterns, dots or lines. You may repeat this step by using watercolour too.

You may choose to add words, a message, names or none at all.
Step 11- Use a round brush and do the lettering. I chosed red paint but it didn’t stand out as much. Let it dry.
Step 12 - Add white gouache or poster paint to highlight the words.
Step 13- Lastly, sign off your artwork.

Once dry, the print can be pasted on your wall or place it at your work desk. To turn it into a gift, simple frame it up!
To end this post, Self and I would like to announce the winner from our first #TheLSexperience-workshop!
Can you spot the winning design?

Congratulation Hanney (@hanneytiara) !We will be contacting you soon once we’ve launch the Nautical Street collection!
-Lully
Leave a comment